Showing posts with label quick kitchen tips. Show all posts

Sunday, March 8, 2009

Stick-free Cooking

Posted by manÜ

Sticking Cake Layers -- Cake layers sticking to the bottom of the pans? Put them back in a warm oven for a short time. The layers will then come out without a problem. Or, try lining the bottom of your pans with waxed paper

Spray your tupperware with non-stick cooking spray before pouring in tomato-based sauces~no more stains!

To easily remove honey from a measuring spoon, first coat the spoon with nonstick cooking spray!

Transfer your jelly to a small plastic squeeze bottle~no more messy, sticky jars or knives! This also works well for homemade salad dressing!

Run your hands under cold water before pressing Rice Krispies treats in the pan~the marshmallow won't stick to your fingers!

If you don't have enough batter to fill all cupcake tins, pour 1 tablespoon of water into the unfilled spots...this helps preserve the life of your pans!

Dropping Cookie Dough -- To get cookie dough to drop without sticking dip the spoon in milk first.

Click Here to Read More..
Related Posts:

Tuesday, February 17, 2009

Cut-Fat Cooking Practices

Posted by manÜ

Let's take a break from those oh so awesome recipes and let's have some practical cooking tips to reduce your fat deposits. You'll never go wrong with these.

  • Grill, steam, bake or microwave your food instead of frying
  • Follow the "1/2 veggies, 1/4 protein, 1/4 carbs on your plate" rule.
  • Eat whole fruits rather than drink fruit juices.
  • Use herbs and spices to flavor meals instead of fatty sauces.
  • Replace full-fat ingredients with low-fat ones whenever possible.
  • Cook in liquids instead of oil.
  • Switch to artificial sweeteners instead of oil.

Source: Reader's Digest

Click Here to Read More..
Related Posts:

Sunday, February 15, 2009

Vinegar's Fruity Merits

Posted by manÜ

When grapes become red-wine vinegar, you get more than a salad-dressing staple: The disease-fighting phytochemicals in the fruit may become even more potent during the fermenting process, according to a study from Memorial University of Newfoundland. Other fruits are finding their way into vinegar, too; apricot, blacurrant and cherry are among the newest varieties.

How to cook with them:
Top chefs use fruit vinegars as flavor boosters for anything that needs a sharp, clean lift -- from a splash of balsamic on roasted butternut squash to a raspberry-vinegar glaze over poached pears with vanilla ice cream. Plus, they shine on salads with fruits, nuts or blue cheese. And you can use them instead of wine to deglaze a pan.

How to make your own:
You could pay $10 to $55 a bottle of gourmet fruit vinegar in store -- or try the following simple recipe, instead: Heat store-bought wine vinegar to below the boiling point, toss in a handful of berries, refrigerate the mix for a few weeks, then strain out the fruit and enjoy!


by Janis Graham

Click Here to Read More..
Related Posts:

Food-Saving and Recycling

Posted by manÜ

Regarding tomato paste, it seems a whole can of tomato paste is many times too much for some recipes. Suggestion: take a piece of waxed paper, putting it on a cookie sheet and putting teaspoonfuls of the leftover paste on the paper -- another sheet on top and freeze this. When frozen just peel them off and put them in a baggie and when you need a tsp. or tbs. of paste you have it without opening a whole can and there is no waste. OR-- put small amounts in an ice tray and then just pop them out when I need them.

Mash and freeze ripe bananas, in one-cup portions, for use in later baking~no wasted bananas (or you can freeze them whole, peeled, in plastic baggies).

Don't throw out all that leftover wine. Freeze into ice cubes for future use in casseroles and sauces.

Storing Cake -- If you store half and apple in the container which you are storing a cake, the cake will retain its freshness.

Leftover Pie Dough -- Extra pie dough? Cover it with some parmesan and gruyere cheese and you'll bake a delicious appetizer--at the very same meal with your pie as dessert.

If you freeze wild rice it will last 3-4 months compared to a week in the refrigerator. A good trick when you go away on vacation is to place a baggie with a few ice cubes in the freezer. If a power failure occurs while you are gone and the food thaws and then refreezes you will know about it when you get home.

Wrap celery in aluminum foil when putting in the refrigerator it will keep for weeks!

Save celery leaves. Spread them out on paper towels or a paper plate and let them dry. Crumble them into soups, salads and stuffing's. They will add an extra zippy flavor for free.

Broccoli Stalks -- Don't discard the tough ends of broccoli stalks. Use them for making soups.

Instead of throwing away bread heels or leftover cornbread, use them to make bread crumbs. For use later, store them in the freezer.

Don't throw those single serving gelatin plastic cups away, make your own single servings. Place the cups in a muffin holder, fill the cups and place in the refrigerator. It only takes a few minutes and no mess.

Potato chip bag open again and they're all stale and yucky?? Pop them in the microwave for 30 to 60 seconds, let stand for two minutes and they'll be crispy again.

Save your store-bought-bread bags and ties~they make perfect storage bags for homemade bread!

To keep potatoes from budding, place an apple in the bag with the potatoes!

Use lifesavers candy to hold candles in place on your next birthday cake! Kids love 'em!

Cottage cheese will remain fresher longer if you store it upside down in the refrigerator. This slows the effects of oxidation.

To keep milk past it's expiration date add salt. A pinch of salt in a gallon will do it. The salt slows the rate of bacteria growth.

Brown sugar will not harden if stored in the freezer.

Keep the linings from cereal boxes~they make great substitutes for waxed paper!

Moldy Fruit -- What should you do with fruit with mold? Throw it away rather than simply cutting off the mold since mold on fruit goes much deeper than what appears on the fruit.

Click Here to Read More..
Related Posts:

Wednesday, February 11, 2009

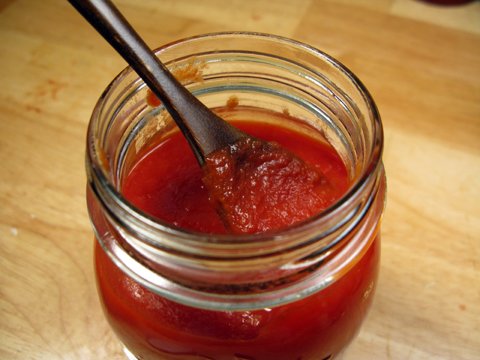
Homemade Ketchup

Posted by manÜ

INGREDIENTS
4 whole cloves
1/4 teaspoon whole allspice

1/4 teaspoon celery seed

1/4 teaspoon chile flakes

1 cinnamon stick (3-inches long)

One 28-ounce can whole, peeled tomatoes with their juice

1 large onion, chopped

1 garlic clove, peeled and smashed

1/2 jalapeno, seeded and chopped (optional)
1 1/2 teaspoons kosher salt

1/2 cup white vinegar

1/4 cup brown sugar


Special Equipment: Cheesecloth


PROCEDURE
Using kitchen twine, tie the cloves, allspice, celery seed, chile flakes, and cinnamon stick together in a medium square of doubled-up cheesecloth. (You just made a bouquet garni!)

In a large, heavy pot, add the tomatoes, onion, garlic, optional jalapeno, salt, vinegar, and brown sugar. Cook over medium heat, stirring occasionally, until the onions and peppers are very soft, about 1 hour.

Remove and discard the secret spice bundle. Let the mixture cool slightly, then puree in batches in a blender or food processor. (Be careful pureeing hot liquids! Don’t fill the blender too full.)

At this point, if the mixture is too pulpy for your taste, pass the liquid through a sieve, pushing as much of the solids through with a rubber spatula as you can. If you prefer your ketchup a little more rustic and a little less smooth, you can skip this step.

Return to your pot and cook over medium heat, stirring to keep from scorching, until the mixture has thickened and darkened slightly in color, about 30 minutes. (If the mixture starts to scorch, turn down the heat a bit.)

Transfer to a container (a glass jar is preferable) and let cool. Cover and refrigerate for at least a few hours to allow the flavors to meld. Your delicious homemade ketchup will keep in the fridge for up to three weeks.

Thanks to http://www.brooklynfarmhouse.com/

Click Here to Read More..
Related Posts:

Thursday, February 5, 2009

Bacon Bowls

Posted by manÜ

Simple and clever. "Weave" the bacon strips around the bottom of a muffin pan covered by aluminum foil. Bake and you have delightful bacon bowls. Stuff it with some veggies or whatever your culinary creativity can think of.


Click Here to Read More..
Related Posts:

Tuesday, February 3, 2009

Valentine's Day Chocolate Candy Hearts

Posted by manÜ

You can sell 'em, give 'em away as gift or enjoy 'em for yourself and your loved ones. Here's a valentine chocolate recipe just for you!

MATERIALS and INGREDIENTS
Plastic heart-shaped candy mold
Red, white and cocoa colored candy melts
Sandwich bags (zipper, not pleated)

Scissors

Spoon

Wax paper
Plate

Wooden skewer or clean craft paint brush


PROCEDURE

  1. Put a handful of candy melts into an open zipper sandwich bag.
  2. Microwave candy in bag for 30-40 seconds or until melted.
  3. Cut one corner of the bag with scissors to squeeze melted candy through. Caution: Bag may be hot, so use paper towel or a pot holder to handle it.
  4. Gently squeeze chocolate out of bag and into the molds.
  5. Tap the side of the mold tray to knock out any air bubbles and flatten chocolate.
  6. Place in refrigerator until set.
  7. Pop out of molds and serve.

DECORATING
Polka dots - Use the flat end of a wooden skewer or a clean craft paint brush to dip into melted chocolate. Dot onto molds, then refrigerate. Remove mold from refrigerator when solid, then add contrasting color according to directions above.

Drizzles - Use a spoon to drizzle melted chocolate across the molds by sweeping a spoon back and forth and allowing chocolate to fall in streams. Refrigerate until solid. Add contrasting color according to directions above.

3D Drizzles - Use the spoon method above, however this time drizzle the chocolate over solid candy that you have already made and let set, rather than drizzling into the molds.

QUICK TIPS
  • Candy molds can be found at discount department and craft supply stores in the craft section near the cake decorating supplies. They look much like a muffin tin, though much smaller and made from clear plastic.
  • You can use chocolate chips instead of candy melts and use food coloring to change or tint white chocolate.
  • Be careful when dealing with melted chocolate as it can be very hot. Always supervise children closely when making anything in the kitchen.

Want another valentine recipe? Click here.

Click Here to Read More..
Related Posts:

Rachael Ray's 3 Kitchen Must-Haves

Posted by manÜ


  • Good heavy-bottomed pots so you can toss pasta.
  • A very sharp knife. You'll use it for everything.
  • A large, heavy cutting board that doubles as a work space. If you don't have a big kitchen, place it over the sink and use it as a counter space.

Click Here to Read More..
Related Posts:

What You Should Put on Your Plate

Posted by manÜ

There's sooo much food choices out there but just don't eat what you like. There are health risks in not eating the right food. In the same way, smart choice reaps generous returns. Here then are the basics of heating healthy, the food you should stuff your plate.

  • Unprocessed foods -- those closest to their natural state.
  • "Naked" foods: fresh fruits and vegetables not covered in fat, salt or sugar.
  • Protein from lean animal, fish, and/or plant sources at every meal (e.g. skinless chicken, salmon or beans)
  • High-fiber foods such as wholegrain breads and sweet potato.
  • Plain water (up to eight glasses a day).
  • Low GI foods such as oats, legumes and sweet potato.
  • Foods low in saturated and trans-fats such as rice, nuts and pasta.
  • Low-fat dairy foods such as skim milk and low-fat yoghurt.
  • Zero-calorie teas.
  • Spicy foods that may speed up your metabolism, such as chili.

Click Here to Read More..
Related Posts:

Top Chip

Posted by manÜ

Did you know that a portion of fish and chips contains 20% less fat than a 12-inch cheese and tomato pizza? Try this healthy chips recipe at home, created by celebrity chef Mark Hix.

4 large baking potatoes weighing about 200-250g each
5-6 tbsp olive oil
2 cloves garlic, peeled and crushed
2 tbsp rosemary leaves
3 tbsp freshly grated parmesan

PROCEDURE
Preheat oven to 200ºC (gas mark 6).
Halve the potatoes, then cut each half into 6 or 7 chips.
Place in cold water, bring to boil and simmer for 3-4 minutes.
Drain in a colander.
Heat oil in roasting tray in the oven, then add potatoes, garlic and rosemary. Season.
Cook for 45 minutes, turning a couple of times, until crisp and through.
Scatter parmesan over and return to oven for 10-12 minutes.

Click Here to Read More..
Related Posts:

By Dicas Blogger e C�digos Blog